Search help articles
Raising an invoice from an appointment
To raise an invoice from an appointment:
1) Navigate to the Calendar tab and select the appointment you wish to raise an invoice for.
2) Click the blue Checkout button.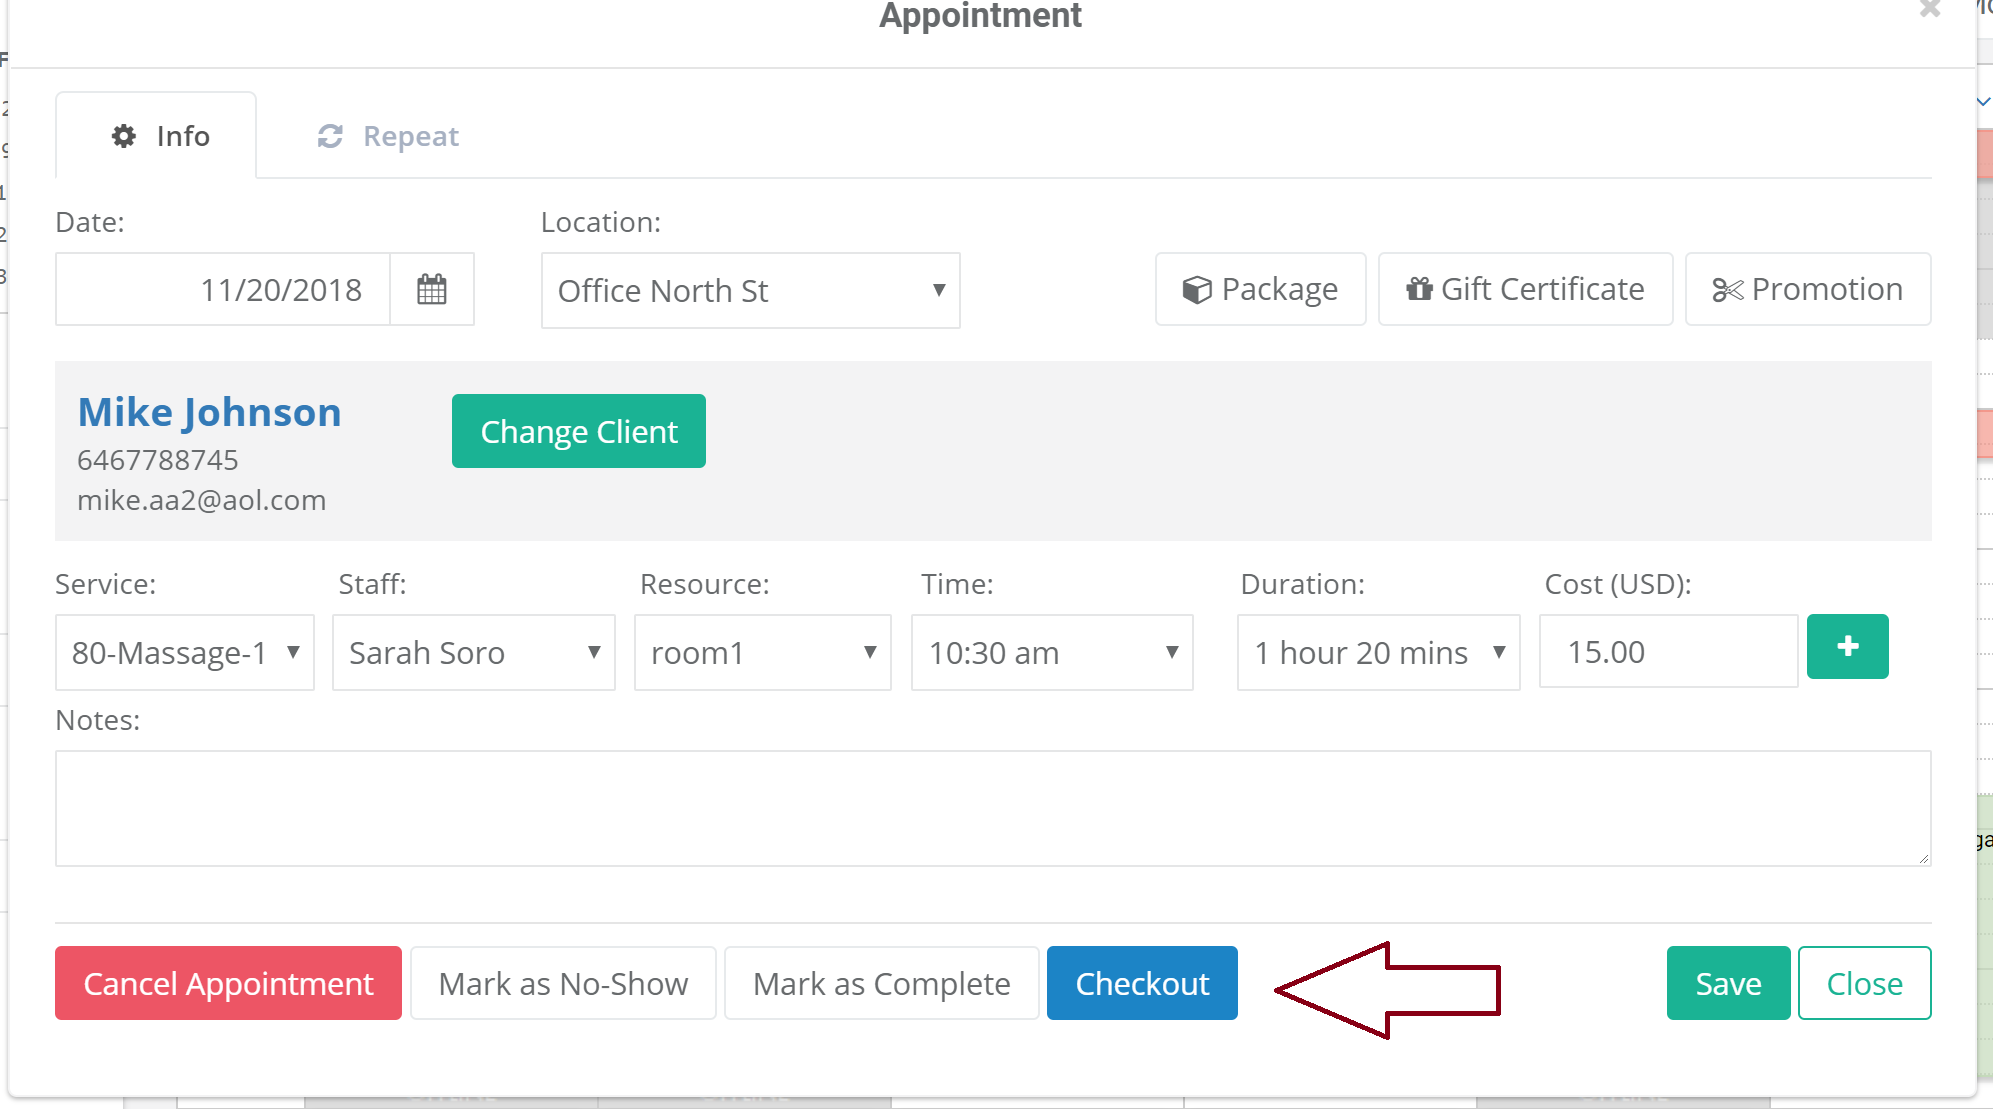
3) Review fields before completing the sale. You can also add an additional item (service, class, course, package, membership, or product) to the invoice. Click the green Checkout button to generate the invoice.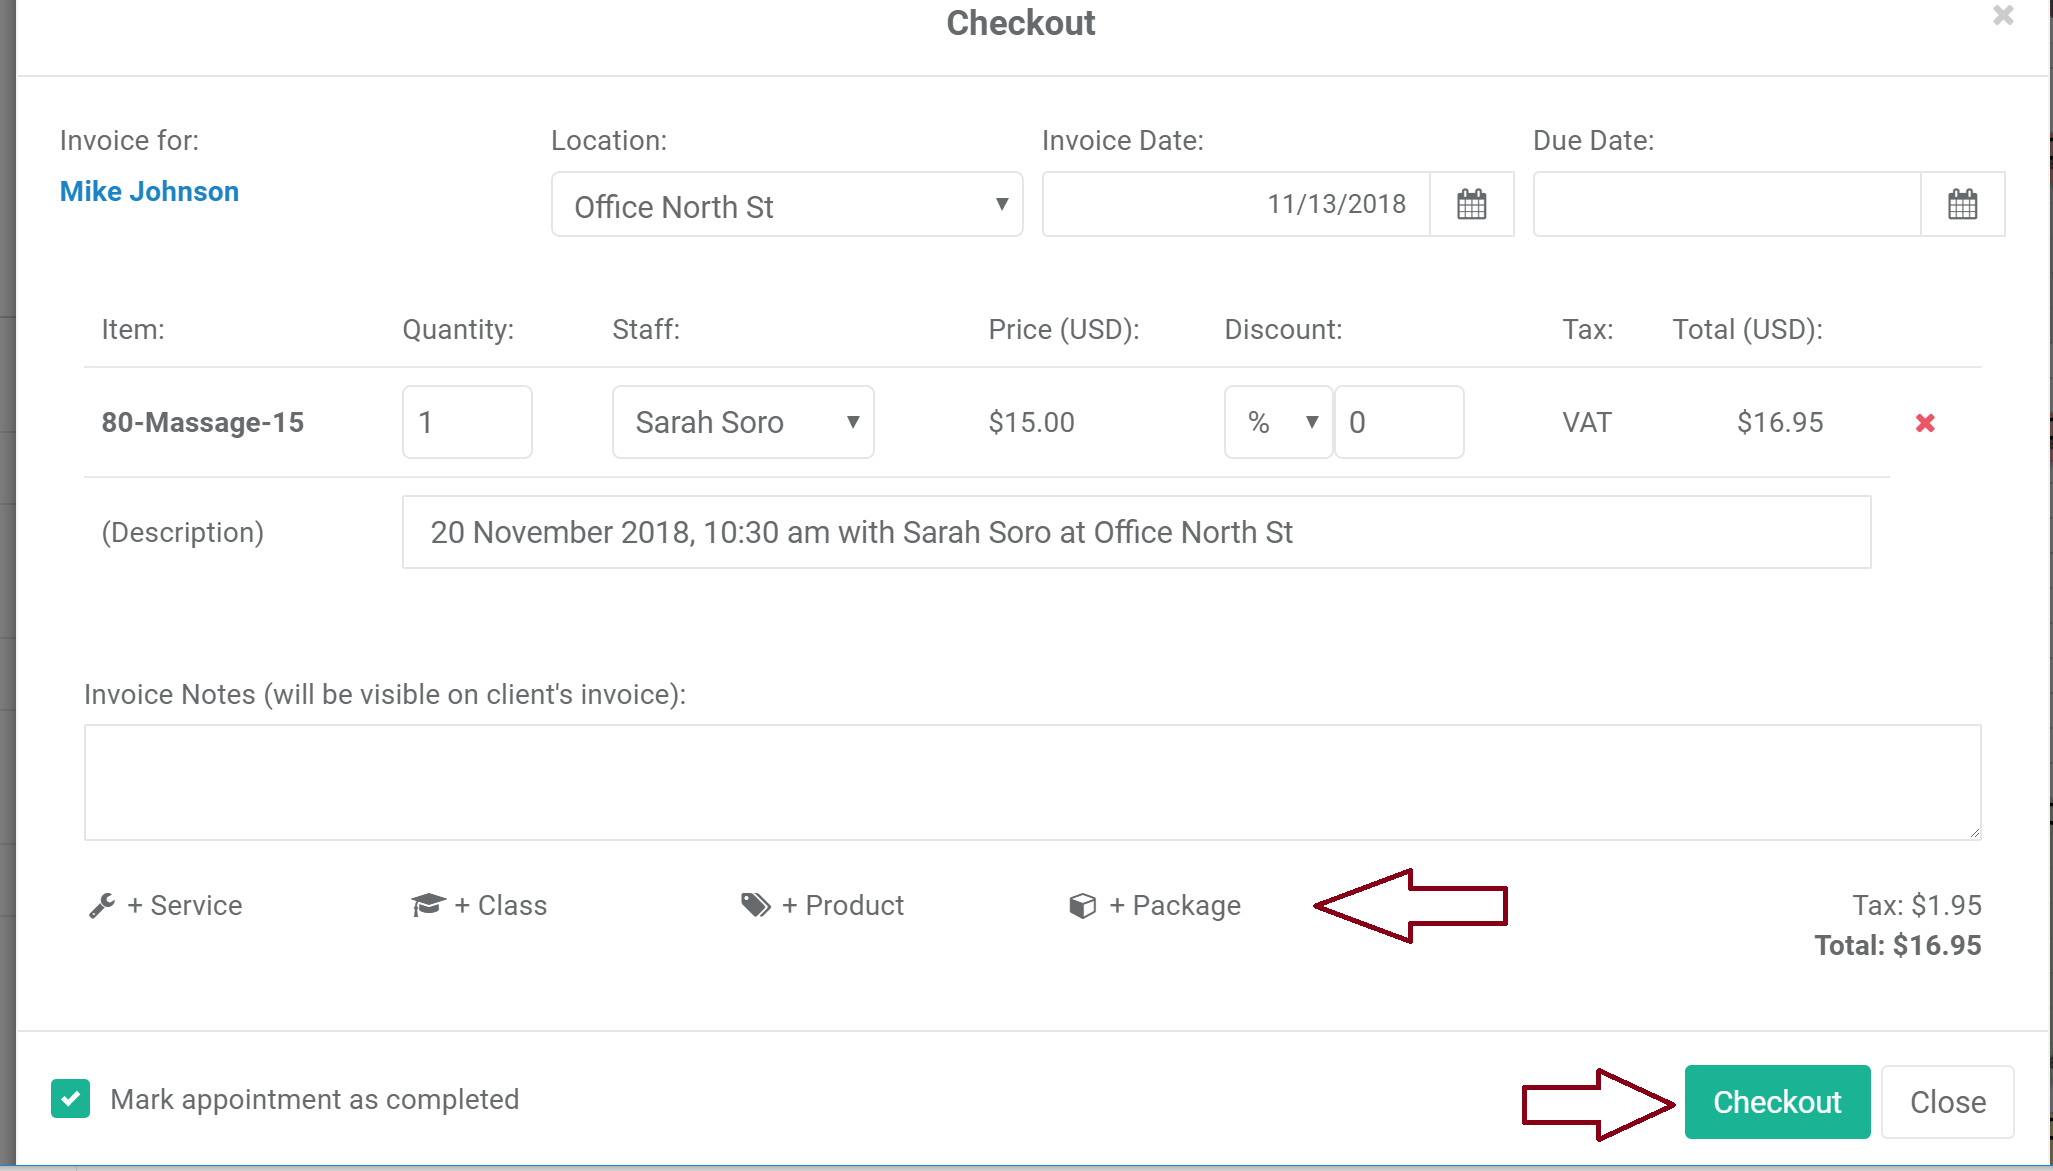
4) Select appropriate payment option for the generated invoice. You can use the client’s card on file to pay for the invoice by selecting 'Credit Card - Online' option. If you would like to keep an invoice unpaid, select 'Save Unpaid' option under the payment type and click 'Apply'.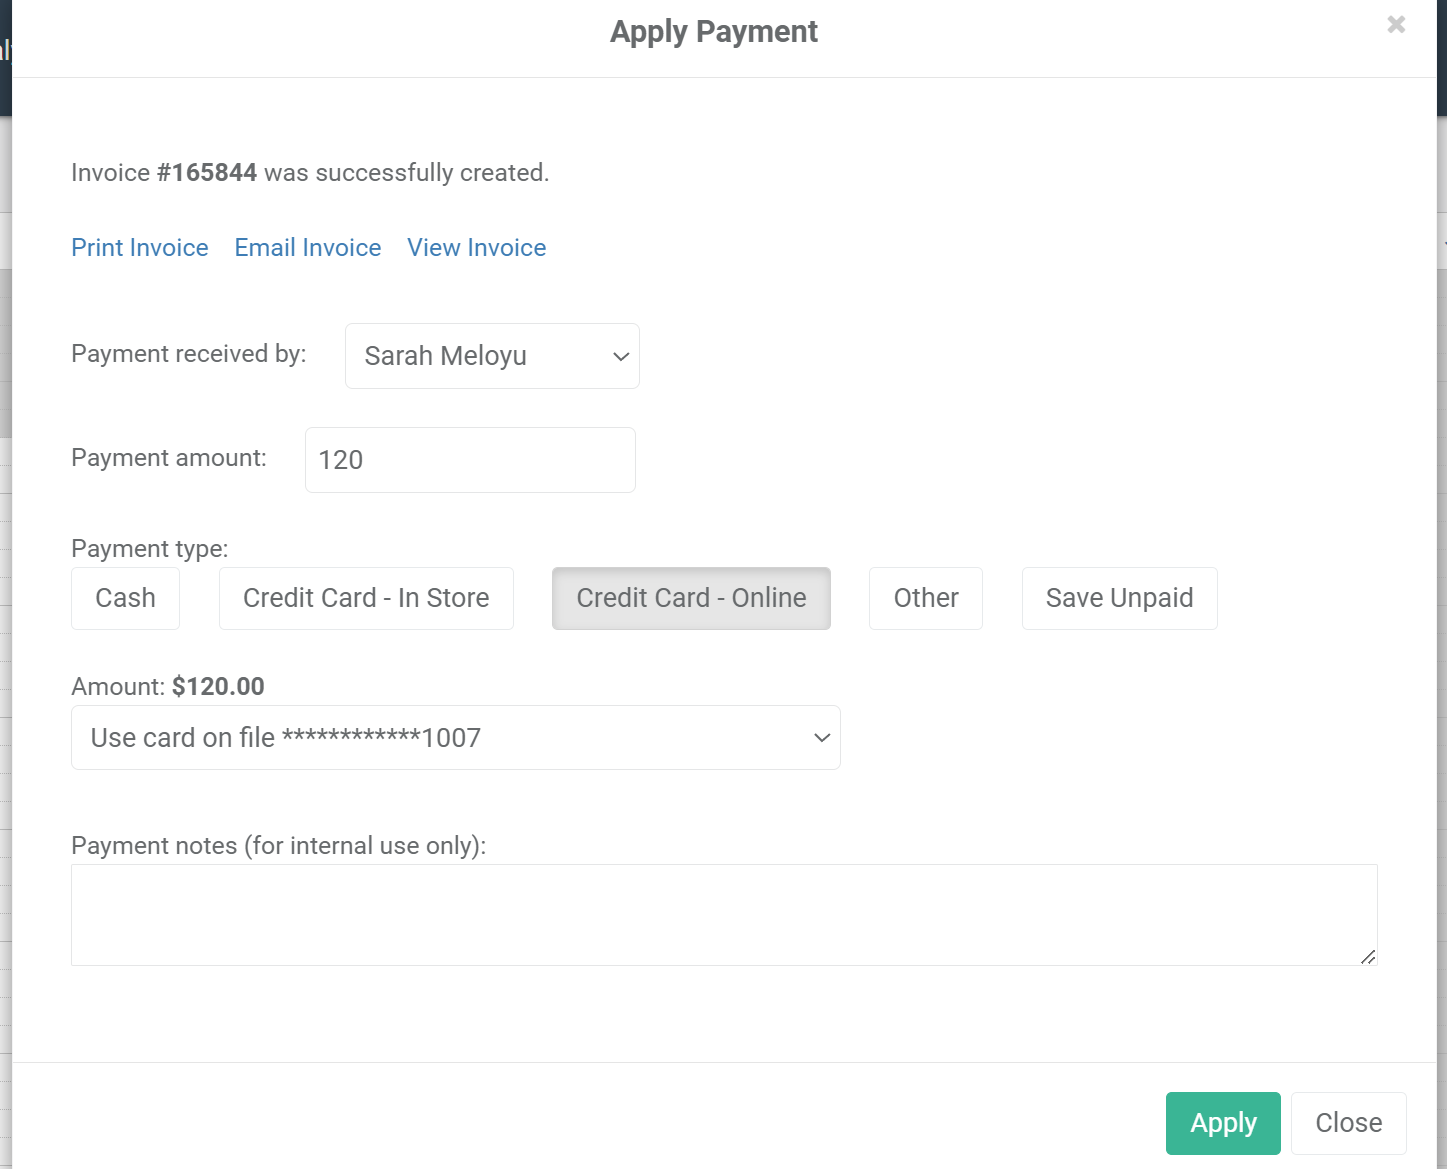
5) Now that the invoice has been generated an invoice icon will appear on the appointment time slot.![]()
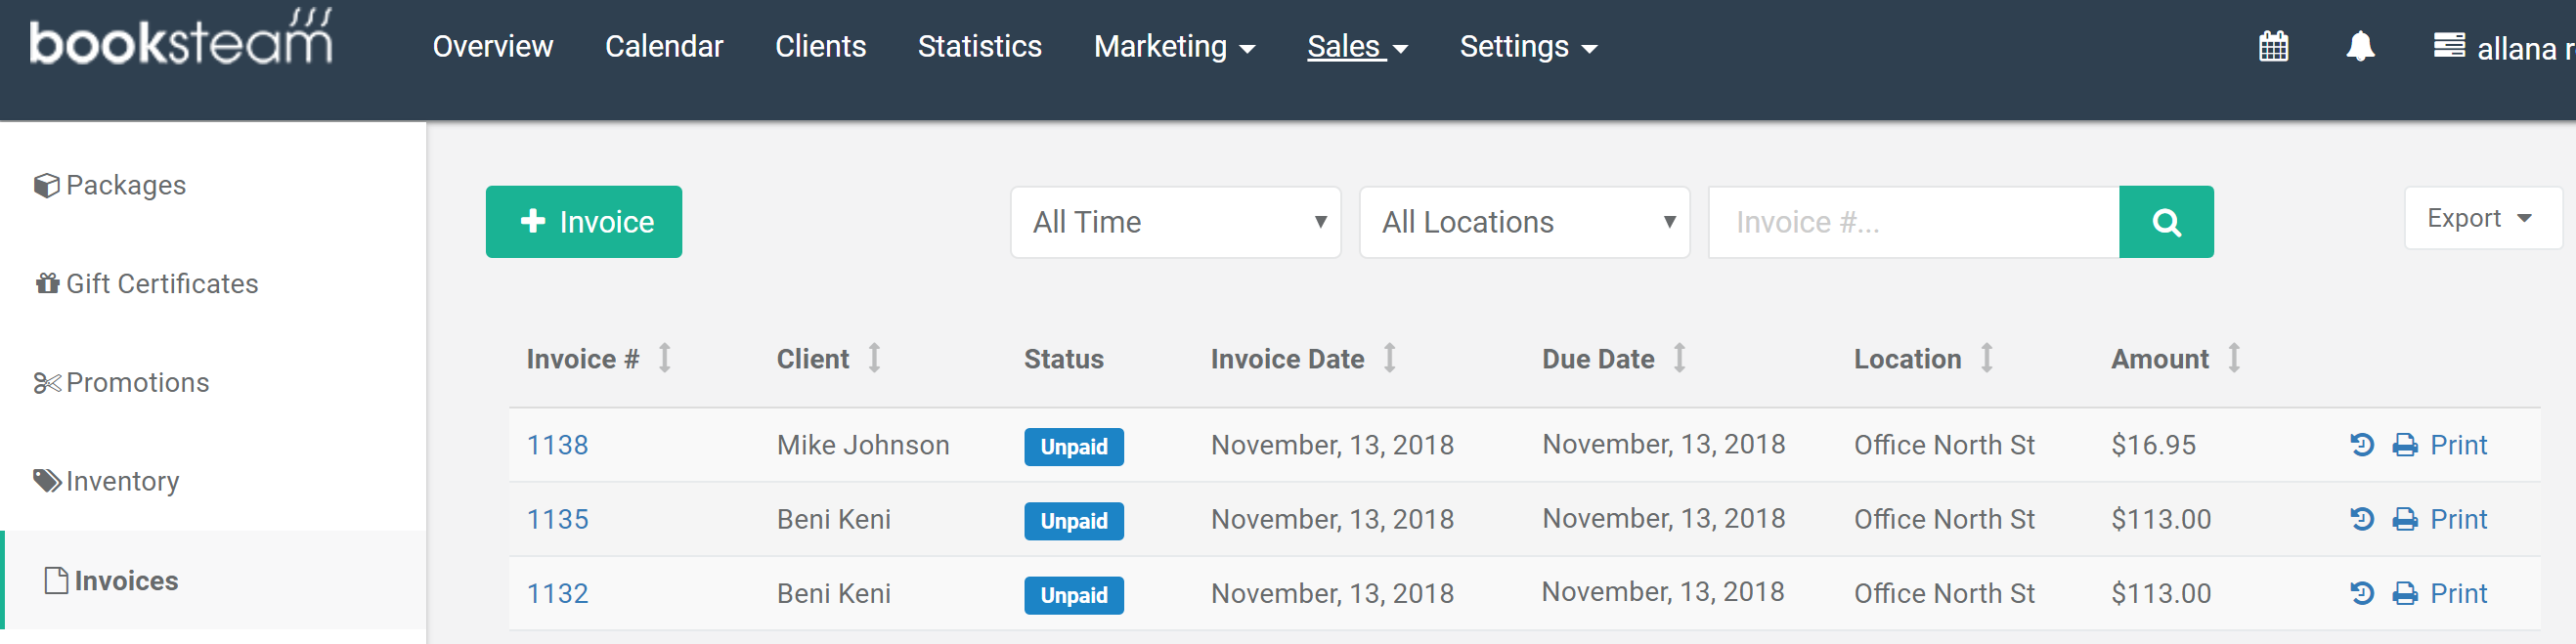
6) Created invoice will now appear in the Sales > Invoices tab (as well as in the client's profile).